Little “Princess” has just been diagnosed with an ear infection at your local veterinary hospital. You have a nice bag of medications and a list of instructions on how to treat Princess’s ears for the next week or two. Unfortunately for you, little “Princess” has just transformed into little “piranha.” Don’t worry… you are not alone! Ear infections in our pets usually come with one big stumbling block… pain. Ask someone who has had an ear infection if it was painful! This is part two of our three part series on otitis externa. In this issue we will dive into the subject we would all like to avoid… treating an infected painful ear. Remember, treating otitis externa is not a quick fix. It can take weeks of treatment to resolve the infection and reverse the damage that has occurred within the ear canal. You need two things: patience… and a plan. Your treatment plan needs to include preparation, some tips on applying ear products, and some do’s and don’ts.
Preparation
Have you ever tried to do a project around the house without preparing? Forget your grocery list? Ha! We all have! Treating your pet’s ears is no different. Preparation is a must. Here’s what you need to get started:
- First, choose the best location. Avoid any carpeted areas. Some oil-based medications can soil carpets and rugs so always seek out a tiled area such as a kitchen or laundry room. Some prefer the outdoors for larger breeds.
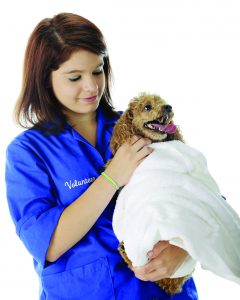
- Proper restraint. If you have the perfect patient, no restraint is necessary. For the rest of us, we may need a little assistance. My pets can see the ear medication bottle coming from down the street. Another pair of hands is ideal, so recruit whoever is available… the cable guy, if needed. Most treatments can be done without a lot of restraint. Other tactics may be warranted. For small breeds, wrapping a thick towel around your pet, hot dog style, may be beneficial. With medium sized pets some have tried laying the pet in their lap, draping a leg across their body and treating it on the floor. For larger breeds, where you are wrestling with their size and strength, securing “Sasquatch” with a leash to anything stable may help.
- Have plenty of towels handy. Lay a towel under your pet or wrap the towel around the neck like a barber’s drape. Treating ears can be messy pastime especially when using ear cleansers.
- You will need some facial tissues or baby wipes for wiping out and removing debris from the ears. I prefer baby wipes. They are usually larger, moist, more durable, and they smell good! Cotton balls and gauze pads are okay but seem a little less friendly to use. Avoid Q-tips.
- Medications need to be readily accessible and ready to roll.
- Have several treats available. Bribery is your friend. You can’t give enough treats. Use before, during, and after treatment. This does not have to a negative experience.
- And above all bring lots of patience. Your mindset can make all the difference in the world.
Think “Zen-like” and be calm!
Bring on those ears!
Recognize that there are as many tips for applying ear products as there are veterinarians. So, above all, use the ones that work best for you and your pet. Remember, success in treating otitis comes only after a deep thorough cleaning of the ear canal by your veterinarian. Your job is to keep ‘em clean. Let’s get started. Applying ear products fall into two categories. Applying cleansers to clean the ears versus applying medications are as different as Venus and Mars!
- Applying ear cleansers. Cleansers come in a variety of formulations. Some are stronger at removing wax, debris, and lipids and others are stronger at controlling infectious agents. Most are fairly inexpensive and usually come in large bottles. They are typically more user friendly and are formulated as water-based products in contrast to the oil based preparations of ear medications. In the next issue will introduce you to the wonderful world of selecting cleansers and what goes into your vet’s decisions. First step: “Hey doc, how much do I put in the ears?” When it comes to cleaning ears, think drench, not drops. FILL UP THE EAR CANAL! Don’t be bashful. Fill those ear canals until they are overflowing. It’s messy. Don’t wear your Sunday best. Cleansers work best if left in for 2 to 5 minutes, so do what you can. The next step in cleaning ears is critical. It determines success or failure in a lot of cases: massaging. For this part, think minutes not seconds! The goal is to break up all the wax and debris found in the deeper parts of the canal. A couple of little squeezes on the floppy part of the ear won’t do anything for that dry hard plastic-like debris. Massaging occurs at the base of the ear just below the ear opening and it usually takes 1 or 2 minutes to do any good at all. Now let your pet “shake it out.” Next step: wipe the ear out with baby wipes or facial tissue. If you see a lot of debris on your wipe, fill the ear canal again and repeat. “Hey doc, how long do I clean the ears?” My FAVORITE response: “Until they’re clean!” Note, some pets will not need any ear cleaning after the sedative ear flush so go right to the next step…
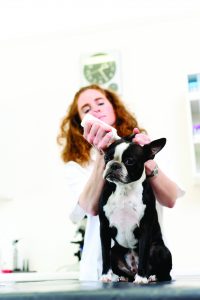
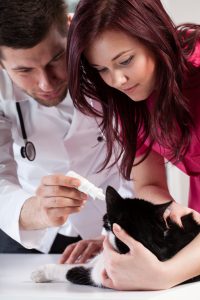
- Applying ear medication. Your doctor will prescribe the proper medication depending on the results of the ear tests and what is seen with the otoscope. Most ear medications are fairly expensive, come in small bottles, and are oil based. They are the “big guns” to help resolve the ear infection, but only after the ears are cleaned and prepared for treatment. You will get discouraging results if they are used as the sole treatment. The amount you apply is determined by size of your pet and subsequently the size of the ear canal. Not all ears are created equal. In general, small breeds need ½ cc, medium breeds ¾ cc, and large breeds 1.0 cc of medication. This equates out to roughly 7 drops, 15 drops, and 30 drops, respectively. Some vets like the dime sized amount, the nickel sized amount, and the quarter sized amount of medication. Others prefer a light squirt of the bottle, a medium squirt, and a more robust squirt of the medication bottle. As before, massage, but only for a brief time of 10 seconds to work the medication into the ear. Our goal now is to line both sides of the ear canal with medication—not to fill up the ear. The final step is to wipe out any excess medication and leave a thin film of medication around the ear opening and up on the inside of the floppy part of the ear. I like a facial tissue for this. And lastly: Don’t forget those treats and lots of TLC!
Some Do’s and Don’ts
- Do not try to clean a painful ear at home. Treat the first five days with your ear medication to relieve the pain, swelling, and inflammation. Then add in ear cleaning to your treatment plan once the “fire is put out.”
- Do not undertreat. Use sufficient amounts of medication, especially with the large breeds.
- Do not use Q-tips.
- Do not rely on any ear medication to be the miracle drug to resolve otitis. Ears must be cleaned thoroughly prior to medicating and the appropriate drug selected.
- Do not stop treatment too early. This is a common cause of failure. You may think the ears are back to normal, but the ear canal will not be back to normal. Flare ups will result in return of pain, infection, and discouraged pet owners.
- Do not experiment with home remedies or medications that were used in the past. Each ear infection is quite different and experimenting may only prolong your pet’s discomfort.
- Do consult your vet. Your doctor will have the best plan to get your pet back on its paws as quickly as possible.
- Do take steps to prevent reoccurrences, whether this involves treating any underlying allergies, drying out ears after “pool time,” or just weekly cleaning of ears.
- Do seek professional help at the first sign of any head shaking or ear scratching. Most cases of otitis will not get better on its own.
- Do note that ear infections are not a quick fix. Some may take weeks to months, while others are a lifetime commitment.
And do remember: Every pet deserves to have the best quality of life for as long as possible. They are our best friends!

